Deploy a Consensus Signer
At the end of this guide, you will get the Remote Signer URL for a Consensus Key Signer using Amazon Key Management System (KMS) as a backend.
Prerequisites
You need:
- an existing baker setup, with an Octez node synchronized to the network of choice (Ghostnet, Mainnet...)
- an AWS account
Create a Baker Authorized Key
Your remote signer URL will be publicly accessible. To protect it, we authenticate all requests with a key located on your baker.
This key must be a secp256k1 key (starting with tz2).
To create such key, on your baker node, run the following command:
octez-client gen keys kms-authorized-key --sig secp256k1
Then take note of the public key:
octez-client show address kms-authorized-key
Hash: tz2QMsPySFa7DzQx9CWygur3gjrNHuWjpQw4
Public Key: sppk7b9Vxiryxtz6k26NHZsCCZGLa1hKMCgMsSrdxHeGBeHHvkUAmfe
This public key, starting with sppk, must be passed to the serverless app during creation. Then, the app will know that the signature requests come from your baker.
Read more about Authorized Keys in the Octez documentation.
Pick a Region
Your baker will send signature requests to the Serverless Function regularly, up to 8 times a minute.
For your baker to work reliably, it is important that the baker and the signer be in close geographical proximity.
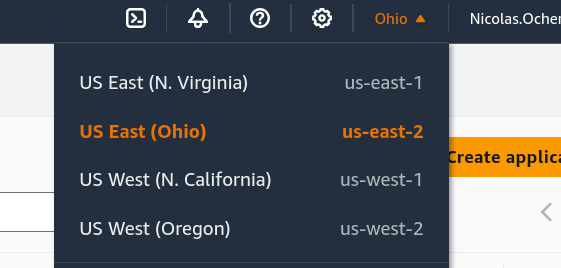
Therefore, you must pick the AWS region closest to your baker. In this guide, we use us-east-2 (Ohio).
Log in to your AWS account and navigate to the AWS Lambda Console.
On the top right of the console, pick your region of choice.
Install the tezos-consensus-kms-signer app
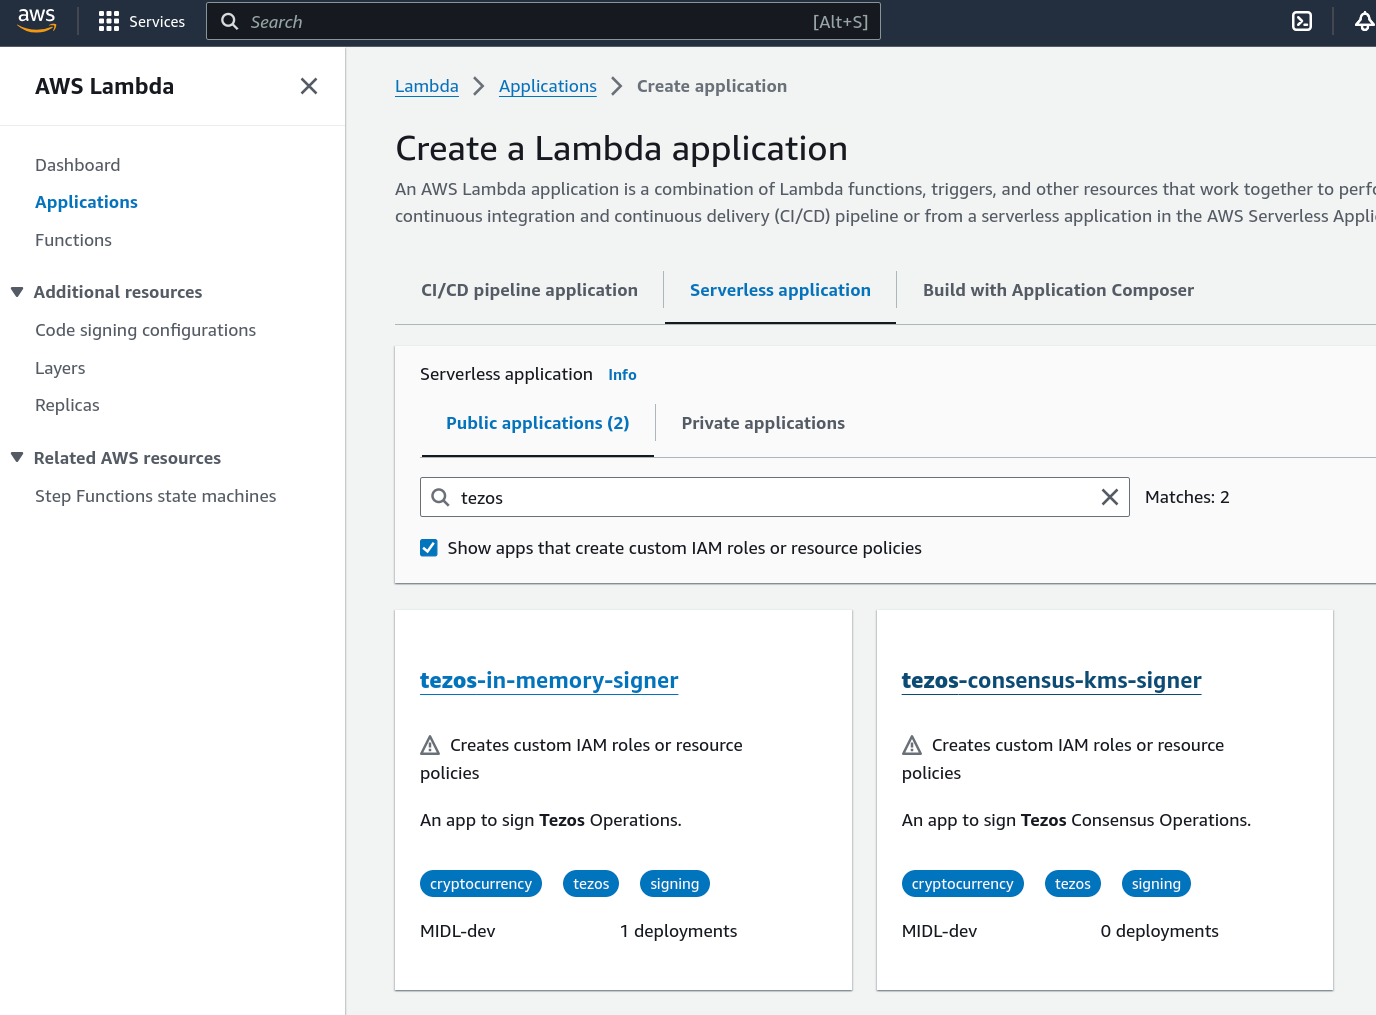
From the AWS Lambda Console, on the left sidebar, select "Applications", then click "Create application". Then, choose "Serverless Application".
In the search bar, enter "tezos" and select "Show apps that create custom IAM roles or resource policies". Then, pick "tezos-consensus-kms-signer"
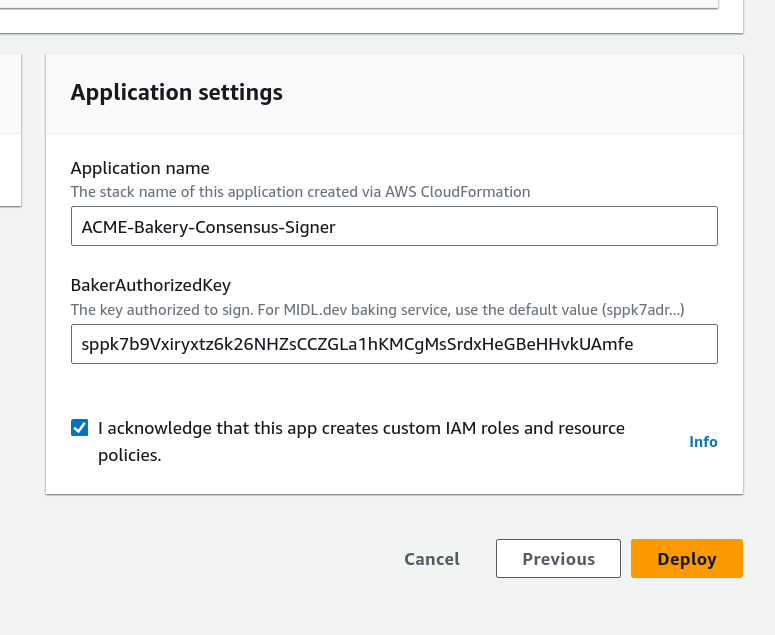
- under "Application name", enter "ACME-Bakery-Consensus-Signer" (replace with your bakery name).
- under "BakerAuthorizedKey", enter the public key (starting with
sppk) of your baker authorized key.
Then, select "I acknowledge" and click "Deploy".
Retrieve the Consensus Public Key and Signer URL
Wait one to 2 minutes and observe your resources being created.
Then, select the "Deployments" tab and click the "CloudFormation stack" link.
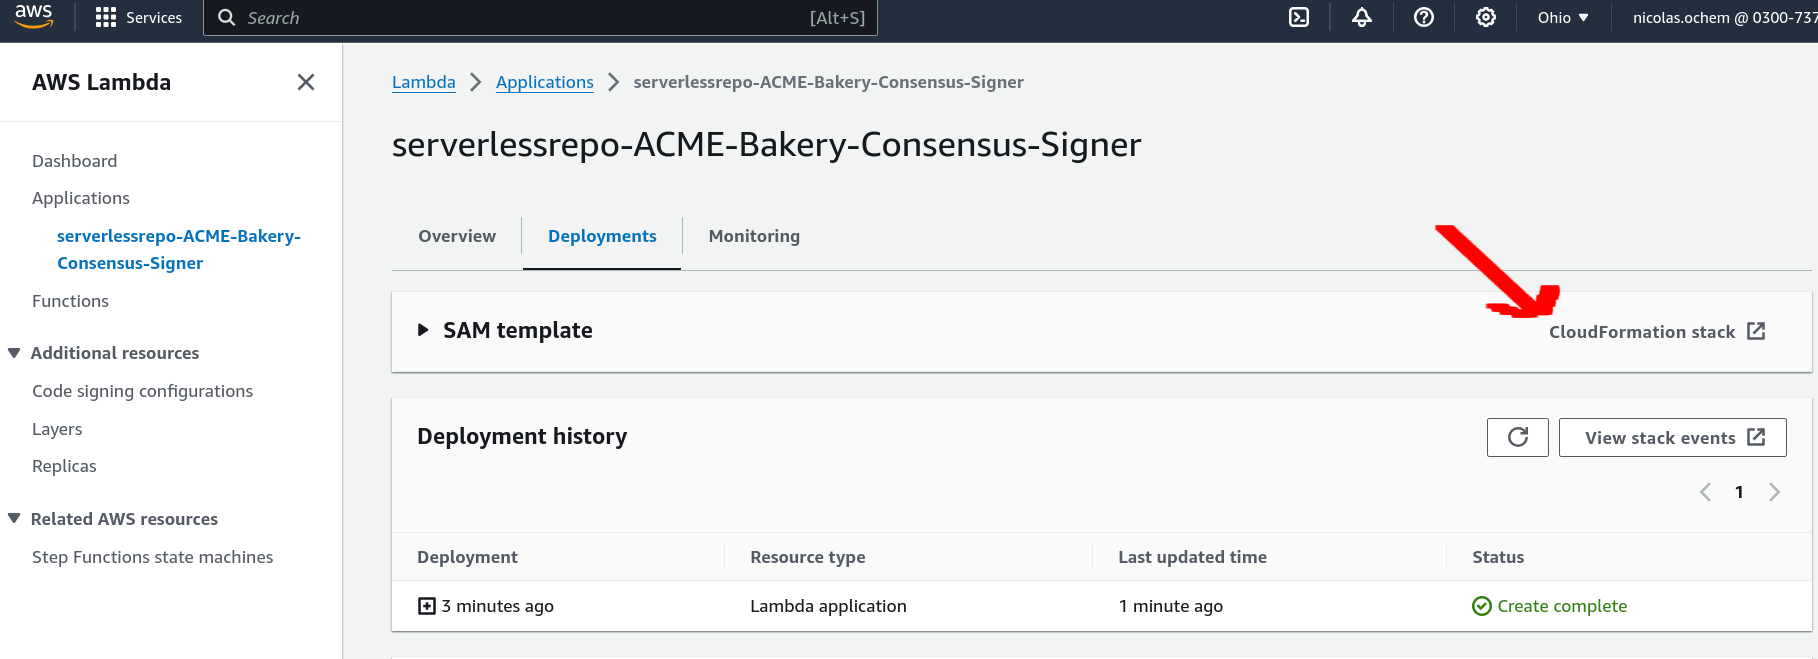
Then, select the "Outputs" tab.
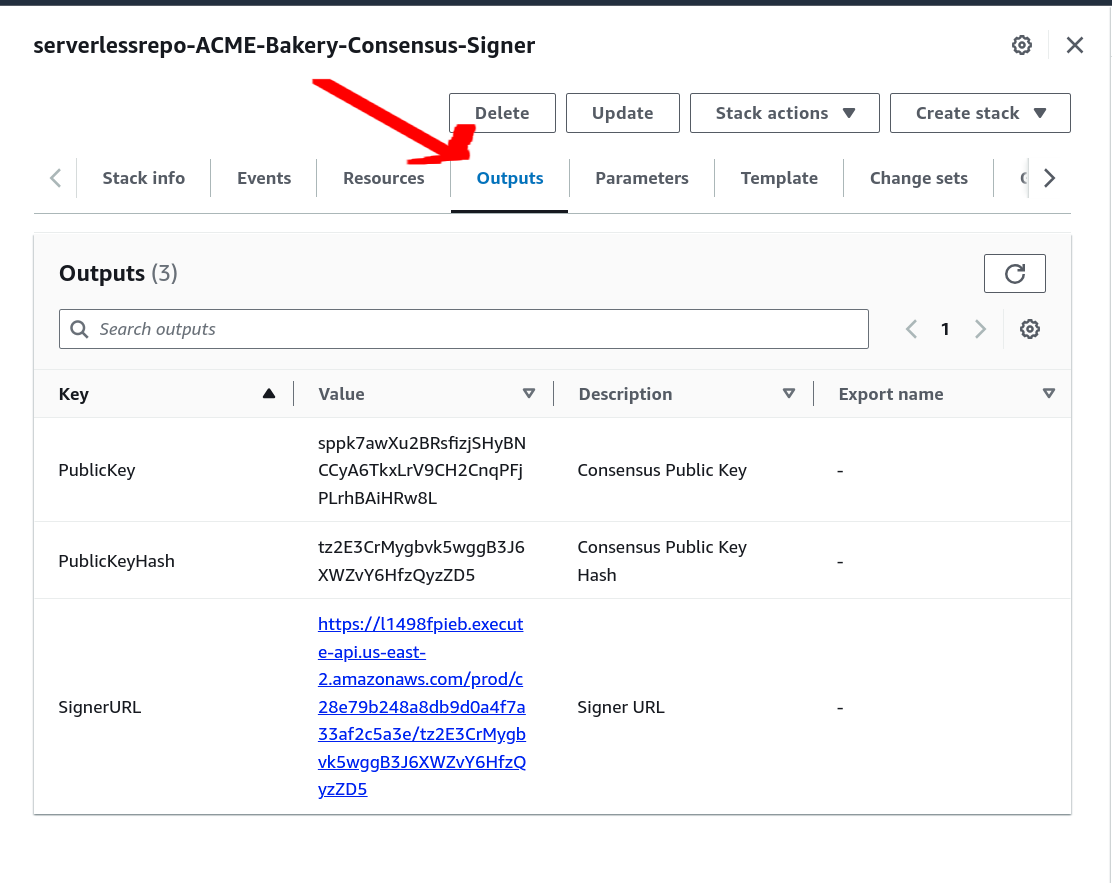
Retrieve all three values:
- PublicKey: the Consensus Public Key. You will need it to register.
- PublicKeyHash: the Consensus Public Key Hash.
- SignerURL: the URL of your Remote Signer.
You may test your signer URL with curl by removing the public key hash from the URL and replacing it with authorized_keys:
$ curl https://l1498fpieb.execute-api.us-east-2.amazonaws.com/prod/c28e79b248a8db9d0a4f7a33af2c5a3e/authorized_keys
You should see the public key hash of your authorized key in the response.
{"authorized_keys": ["tz2QMsPySFa7DzQx9CWygur3gjrNHuWjpQw4"]}
You may now proceed to the next step - register a consensus key for your baker.